Tuesday, May 3, 2011
Shimano Eclipse Telescopic Rod
Tried out my new telescopic rod with my current reel, a Tica reel with 8lb mono. Not too bad leh! Probably hold out on getting a new reel.

Monday, May 2, 2011
Shimano Eclipse Telescopic Rod
I had a flight to Sydney and found a tackle shop that was right in the Sydney CBD. Emailed ahead to ask whether they had the model I was looking for in stock. They said they did.
So I visited the tackle shop and had a feel of the telescopic rod. Not bad, pretty light, extends to 6ft6inch and best part, its only AUD$30. So I bought it!
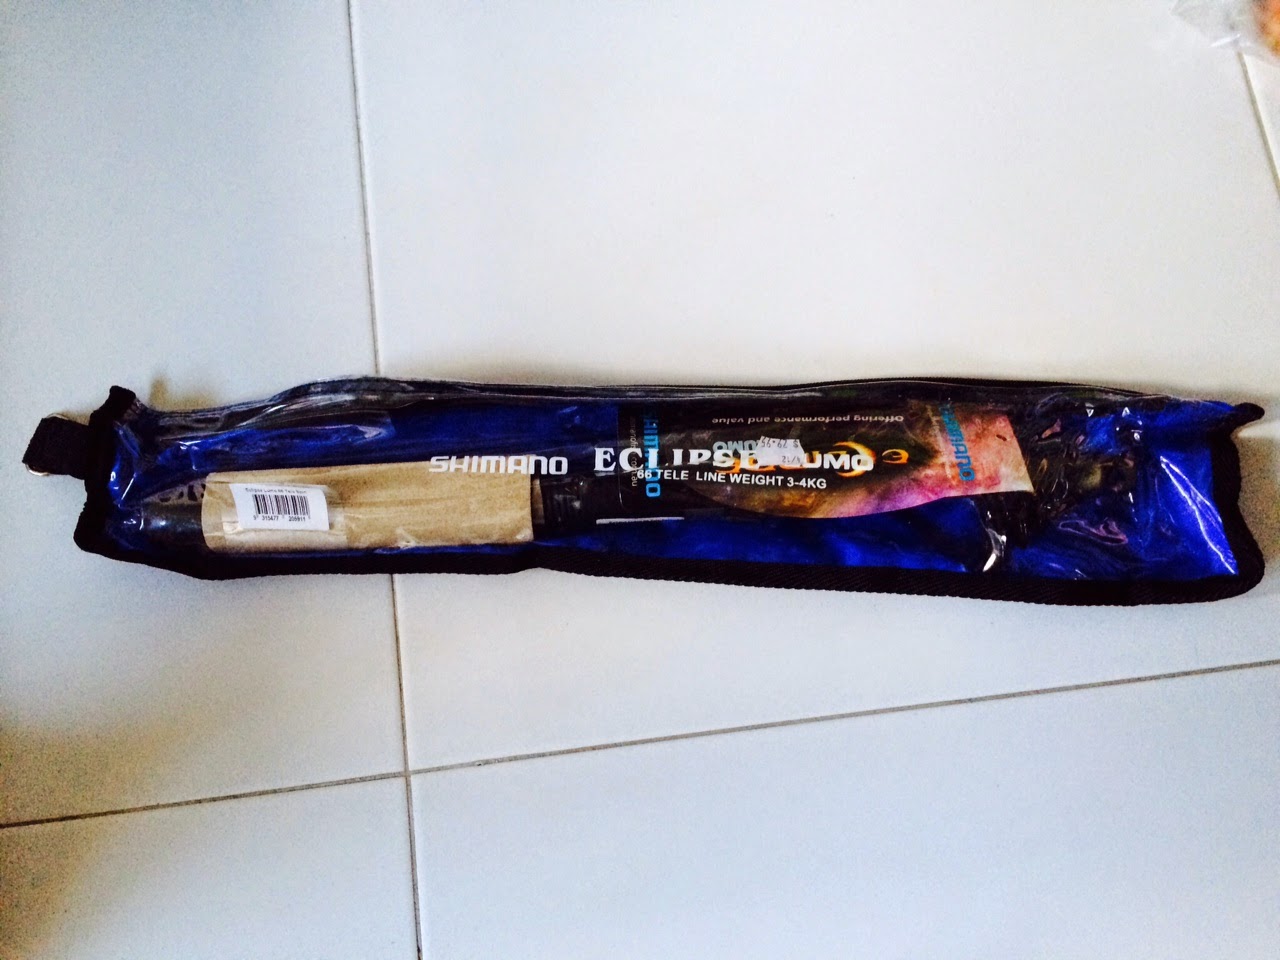

So I visited the tackle shop and had a feel of the telescopic rod. Not bad, pretty light, extends to 6ft6inch and best part, its only AUD$30. So I bought it!
Saturday, April 23, 2011
Rod options online
I'm the kind of person that likes to look for information online before I commit to purchasing an item. So when it came to fishing rods, I did my research the same way. The problem is that the Singapore tackle shop websites are just not that great to navigate around. In the end, I went to Shimano Australia website (http://www.shimanofish.com.au)to get all the information I needed for the rod. Australia seems to have the closest fishing conditions like Singapore so their gear would be suitable for use locally as well.
While scouring the pages, I came across the Shimano Eclipse Travel Telescopic rods. They have a wide range of rod lengths and it 'stows' to only 40 cm! I think I've found my fishing rod!
While scouring the pages, I came across the Shimano Eclipse Travel Telescopic rods. They have a wide range of rod lengths and it 'stows' to only 40 cm! I think I've found my fishing rod!
Friday, April 22, 2011
Kayak fishing tackle
With kayak fishing, one needs to really cut down the number of items one brings for the trip. With this is mind, I decided to go with ultra light tackle gear. Shortest 2pc rod and lightest reel.
Went to Changi Village to look around at my options. Most of the UL rods were 1 pc and the 2pc rods were at least 3ft for the longest section. Not a good sign.
The reel selection wasn't too bad. There were lots of options to choose from depending on budget.
So I thought I'd better scour the Web to see what rods are out there that suits my criteria.
Wednesday, April 6, 2011
Wet testing the kayak
Hi all,
Today I went out for the first time on my new inflatable kayak. Got all the safety gear in place as what was shown by bro babymerv on my kayak adventure with him.
0745 -Launched at Changi Boardwalk area and started safety drills first. Sat in the kayak and rocked the kayak to its tipping point(rather difficult actually, due to its wide base), and capsized. I made sure that I was not able to touch bottom when I capsized to simulate capsizing in deep water. Once overboard, flipped kayak over and tried re-boarding. Successful re-boarding on 2nd attempt but took in a bit of water into the cockpit. So decided to try another time. This time, less water in the cockpit and boarded quicker.
Capsize drill:
1. Turn over the kayak by grabbing the handle that is furthest away from you. Pull this handle towards you while pushing up the handle that is closest to you. This will flip that kayak back to its normal state.
2. Find the middle of the kayak where the handles are and position your body facing it.
3. Reach over and grab on to the opposite handle. In one big effort, kick your feet hard and pull your body up and onto the kayak.
4. Try to pull yourself so that your core(stomach) rests on top of the kayak.
5. Once up, it's just about trying to turn over into a sitting position and you're SAFE!
Look up some of kayak capsize drills on Youtube. The kayak may be different, but the recovery is the same.
Once safety drills completed, loaded up with a ultralight rod n just a lure as this was supposed to be a familiarization session. Kayaked around near the red buoy on rocks and tried casting the lures. Problem was that the wind was blowing easterly while the current was going the opposite direction! Kayak was drifting eastwards and had to keep paddling back to the buoy area. Tried a few casts but no bites.
Around 930am, the wind really picked up and decided to head back to launch point. All in all, it was an interesting day and very satisfied with my new kayak. Hopefully I can now follow some bros here when they go out kayak fishing!
Monday, March 28, 2011
Opening my new 'adventure'!
Brought back my Airis kayak from US and began unpacking it at home. Following the way the kayak was packed ex-factory, I used a permanent marker to mark where the crease/fold lines were on the kayak so that I know how to repack later.
Inflated the kayak and seat cushion in less than 15mins!
The pump included was like those bicycle pumps except that it had a pressure gauge and its 2-action pump. Meaning it pumps on the up AND down cycle. Awesome!
Inflated the kayak and seat cushion in less than 15mins!
The pump included was like those bicycle pumps except that it had a pressure gauge and its 2-action pump. Meaning it pumps on the up AND down cycle. Awesome!
Thursday, March 3, 2011
Buying my kayak
After my kayak fishing experience, I decided that kayak fishing was something that I would like to do. So I searched the Internet for the kayak that would suit my situation. I needed a kayak that is within my budget ($1k), portable, takes up little storage space and big enough for me (I'm tall). Hard shell kayaks were out of the question as I don't have a car. So it was down to inflatables.
There were some fishing kakis in Singapore that were using the Advance Elements kayaks. I had a look at the specs and decided that my legs wouldn't fit in properly under the kayak's coaming. Next up was the Airis Sport by Walker Bay. It was a sit-on-top kayak and had several lengths depending on the model. So far, it passed my criteria of:
Budget - under $1k after conversion.
Portable - it was rolled up and fitted into a backpack. (The advert had a guy carrying it while cycling!)
Storage space - Carries like a backpack, so storage no problem.
Big enough - they have several models to choose from. (9, 10 &11ft)
SETTLED! I'm getting an Airis Sport 11

As this was a US company, it meant shipping it to Singapore would have costs a bomb! So I decided to go and collect it myself in US.
There were some fishing kakis in Singapore that were using the Advance Elements kayaks. I had a look at the specs and decided that my legs wouldn't fit in properly under the kayak's coaming. Next up was the Airis Sport by Walker Bay. It was a sit-on-top kayak and had several lengths depending on the model. So far, it passed my criteria of:
Budget - under $1k after conversion.
Portable - it was rolled up and fitted into a backpack. (The advert had a guy carrying it while cycling!)
Storage space - Carries like a backpack, so storage no problem.
Big enough - they have several models to choose from. (9, 10 &11ft)
SETTLED! I'm getting an Airis Sport 11
As this was a US company, it meant shipping it to Singapore would have costs a bomb! So I decided to go and collect it myself in US.
Subscribe to:
Posts (Atom)